简介 对接ceph的rbd和cephfs到k8s中提供持久化存储
环境
主机名
IP
role
操作系统
ceph-01
172.16.31.11
mon osd
CentOS7.8
ceph-02
172.16.31.12
Osd
CentOS7.8
ceph-03
172.16.31.13
osd
CentOS7.8
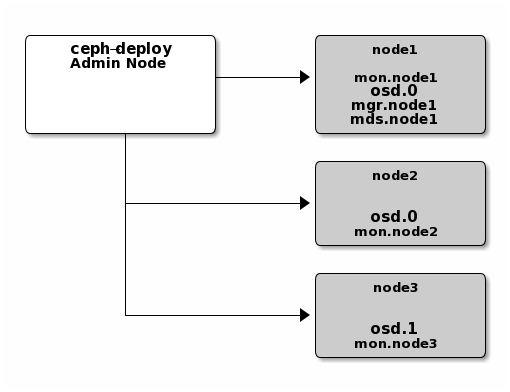
这个是官网的图
步骤 安装ceph 主机名设置 1 2 3 4 5 6 hostnamectl set-hostname ceph-01 hostnamectl set-hostname ceph-01 hostnamectl set-hostname ceph-01
添加主机映射 1 2 3 4 5 cat << EOF >> /etc/hosts 172.16.31.11 ceph-01 172.16.31.12 ceph-02 172.16.31.13 ceph-03 EOF
关闭防火墙 1 2 3 systemctl stop firewalld && systemctl stop firewalld setenforce 0 && sed -i 's/^SELINUX=.*/SELINUX=disabled/' /etc/selinux/config iptables -F && iptables -X && iptables -Z
时间同步 1 2 yum install -y ntpdate ntpdate
ssh无密钥访问 1 2 3 4 5 6 7 8 ssh-keygen ssh-copy-id ceph-01 ssh-copy-id ceph-02 ssh-copy-id ceph-03
准备repo 1 2 3 4 5 6 7 8 9 10 yum install epel-release -y cat << EOF > /etc/yum.repos.d/ceph-deploy.repo [ceph-noarch] name=Ceph noarch packages baseurl=https://download.ceph.com/rpm-luminous/el7/noarch enabled=1 gpgcheck=1 type=rpm-md gpgkey=https://download.ceph.com/keys/release.asc EOF
国内用户可以用阿里的仓库
1 2 3 4 5 6 7 8 wget -O /etc/yum.repos.d/epel.repo http://mirrors.aliyun.com/repo/epel-7.repo cat << EOF > /etc/yum.repos.d/ceph-deploy.repo [ceph-noarch] name=Ceph noarch packages baseurl=https://mirrors.aliyun.com/ceph/rpm-luminous/el7/noarch/ enabled=1 gpgcheck=0 EOF
安装ceph-deploy软件包 ceph-1节点
1 yum install ceph-deploy yum-plugin-priorities python2-pip bash-completion -y
其他节点安装
1 yum install yum-plugin-priorities python2-pip bash-completion -y
创建一个ceph目录 ceph-01节点
1 2 mkdir ceph-cluster cd ceph-cluster
初始化ceph集群 (可选)修改网络接口 如果有两个网卡,可以将管理和存储网分离
1 2 public_network = 172.16.0.0/16 cluster_network = 192.168.31.0/24
安装ceph软件包 1 ceph-deploy install ceph-01 ceph-02 ceph-03
国内加速可以指定阿里云镜像地址,先在所有节点添加这个仓库
1 2 3 4 5 6 7 cat << EOF > /etc/yum.repos.d/ceph-luminous.repo [ceph] name=Ceph packages for x86_64 baseurl=http://mirrors.aliyun.com/ceph/rpm-luminous/el7/x86_64 enabled=1 gpgcheck=0 EOF
然后执行
1 ceph-deploy install ceph-01 ceph-02 ceph-03 --no-adjust-repos
创建mon 1 ceph-deploy mon create-initial
执行完后会创建*.keyring 密钥环
复制配置和秘钥到对应的节点上 1 ceph-deploy admin ceph-01 ceph-02 ceph-03
部署mgr 1 ceph-deploy mgr create ceph-01
mgr是ceph-12.x版本(luminous)新增的组件
部署osd 1 2 3 ceph-deploy osd create --data /dev/sdb ceph-01 ceph-deploy osd create --data /dev/sdb ceph-02 ceph-deploy osd create --data /dev/sdb ceph-03
检查集群状态 测试 创建pool 1 2 3 ceph osd pool create test 8 8 echo `date` > date.txtrados put test-object-1 date.txt --pool=test
上传到存储池中 1 2 echo `date` > date.txtrados put test-object-1 date.txt --pool=test
查看存储池和对象映射 1 2 rados -p test ls ceph osd map test test-object-1
删除 1 2 rados rm test-object-1 --pool=test ceph osd pool rm test test --yes-i-really-really-mean-it
这里删不掉的话,需要添加这个配置
1 mon_allow_pool_delete = true
然后重启mon
1 2 3 4 ceph-deploy --overwrite-conf admin ceph-01 ceph-02 ceph-03 systemctl restart ceph-mon@ceph-01.service ceph osd pool rm test test --yes-i-really-really-mean-it
ceph rbd对接kubernetes 参考github连接:https://kubernetes.io/zh/docs/concepts/storage/storage-classes/#ceph-rbd
创建pool 1 ceph osd pool create kube-pool 64 64
导入admin keyring 获取admin keyring
1 ceph auth get-key client.admin
将key换成上一步输出的结果
1 2 3 kubectl create secret generic ceph-secret -n kube-system \ --type ="kubernetes.io/rbd" \ --from-literal=key='AQDYuPZfdjykCxAAXApI8weHFiZdEPcoc8EaRA=='
创建 user secret 1 2 3 ceph auth add client.kube mon 'allow r' osd 'allow rwx pool=kube-pool' ceph auth get-key client.kube kubectl create secret generic ceph-secret-user -n kube-system --from-literal=key='AQAH2vZfe8wWIhAA0w81hjSAoqmjayS5SmWuVQ==' --type =kubernetes.io/rbd
创建StorageClass 1 2 3 4 5 6 7 8 9 10 11 12 13 14 15 16 17 apiVersion: storage.k8s.io/v1 kind: StorageClass metadata: name: ceph-rbd provisioner: kubernetes.io/rbd parameters: monitors: 172.16 .31 .11 :6789 adminId: admin adminSecretName: ceph-secret adminSecretNamespace: kube-system pool: kube-pool userId: kube userSecretName: ceph-secret-user userSecretNamespace: kube-system fsType: ext4 imageFormat: "2" imageFeatures: "layering"
worker节点安装ceph-common 1 2 3 4 5 6 7 8 cat << EOF > /etc/yum.repos.d/ceph-luminous.repo [ceph] name=Ceph packages for x86_64 baseurl=http://mirrors.aliyun.com/ceph/rpm-luminous/el7/x86_64 enabled=1 gpgcheck=0 EOF yum install -y ceph-common
创建PVC 1 2 3 4 5 6 7 8 9 10 11 12 apiVersion: v1 kind: PersistentVolumeClaim metadata: name: rbd-1 namespace: default spec: accessModes: - ReadWriteOnce resources: requests: storage: 1Gi storageClassName: ceph-rbd
创建deployment 1 2 3 4 5 6 7 8 9 10 11 12 13 14 15 16 17 18 19 20 21 22 23 24 25 26 27 28 apiVersion: apps/v1 kind: Deployment metadata: labels: app: test-rbd name: test-rbd namespace: default spec: replicas: 1 selector: matchLabels: app: test-rbd template: metadata: labels: app: test-rbd spec: containers: - image: zerchin/network imagePullPolicy: IfNotPresent name: test-rbd volumeMounts: - mountPath: /data name: rbd volumes: - name: rbd persistentVolumeClaim: claimName: rbd-1
常见问题 问题1:rbd未加载报错 1 MountVolume.WaitForAttach failed for volume "pvc-8d8a8ed9-bcdb-4de8-a725-9121fcb89c84" : rbd: map failed exit status 2, rbd output: libkmod: ERROR ../libkmod/libkmod.c:586 kmod_search_moddep: could not open moddep file '/lib/modules/4.4.247-1.el7.elrepo.x86_64/modules.dep.bin' modinfo: ERROR: Module alias rbd not found. modprobe: ERROR: ../libkmod/libkmod.c:586 kmod_search_moddep() could not open moddep file '/lib/modules/4.4.247-1.el7.elrepo.x86_64/modules.dep.bin' modprobe: FATAL: Module rbd not found in directory /lib/modules/4.4.247-1.el7.elrepo.x86_64 rbd: failed to load rbd kernel module (1) rbd: sysfs write failed In some cases useful info is found in syslog - try "dmesg | tail" . rbd: map failed: (2) No such file or directory
原因
主要就是没有加载rbd模块,需要到所有的worker节点上加载rbd模块
解决
参考:https://forums.cnrancher.com/q_445.html
问题2:挂载失败 1 MountVolume.WaitForAttach failed for volume "pvc-aa0d2e46-3df3-4c70-a318-ad95d4d0810a" : rbd: map failed exit status 110, rbd output: rbd: sysfs write failed In some cases useful info is found in syslog - try "dmesg | tail" . rbd: map failed: (110) Connection timed out
解决
1 ceph osd crush tunables hammer
参考:https://github.com/rancher/rancher/issues/13198#issuecomment-391920740
问题3:ceph HEALTH_WARN 1 HEALTH_WARN application not enabled on 1 pool(s)
解决
1 2 ceph health detail ceph osd pool application enable kube-pool rbd
部署cephfs文件系统 k8s默认没有cephfs的provisioner,所以需要手动部署一个provisioner去对接cephfs
参考github链接:https://github.com/kubernetes-retired/external-storage/tree/master/ceph/cephfs
部署mds(元数据服务) 1 ceph-deploy mds create ceph-01
创建两个存储池,用来存放实际的数据以及元数据 1 2 ceph osd pool create cephfs_data 64 ceph osd pool create cephfs_metadata 64
创建cephfs文件系统 1 ceph fs new cephfs cephfs_metadata cephfs_data
查看mds状态 部署provisioner 这里有两种方式部署provisioner,其中一种是直接docker run的方式部署,另一种是通过deployment的方式部署到k8s中
docker run方式部署ceph-provisioner 1 docker run -tid -v /root/.kube:/kube -v /var/run/kubernetes:/var/run/kubernetes --privileged --net=host --name ceph-provisioner quay.io/external_storage/cephfs-provisioner /usr/local /bin/cephfs-provisioner -master=https://172.16.0.99:6443 -kubeconfig=/kube/config -id=cephfs-provisioner-1 -disable-ceph-namespace-isolation
deployment方式部署到k8s中 rbac相关yaml
1 2 3 4 5 6 7 8 9 10 11 12 13 14 15 16 17 18 19 20 21 22 23 24 25 26 27 28 29 30 31 32 33 34 35 36 37 38 39 40 41 42 43 44 45 46 47 48 49 50 51 52 53 54 55 56 57 58 59 60 61 62 63 64 65 66 67 kind: ClusterRole apiVersion: rbac.authorization.k8s.io/v1 metadata: name: cephfs-provisioner namespace: cephfs rules: - apiGroups: ["" ] resources: ["persistentvolumes" ] verbs: ["get" , "list" , "watch" , "create" , "delete" ] - apiGroups: ["" ] resources: ["persistentvolumeclaims" ] verbs: ["get" , "list" , "watch" , "update" ] - apiGroups: ["storage.k8s.io" ] resources: ["storageclasses" ] verbs: ["get" , "list" , "watch" ] - apiGroups: ["" ] resources: ["events" ] verbs: ["create" , "update" , "patch" ] - apiGroups: ["" ] resources: ["services" ] resourceNames: ["kube-dns" ,"coredns" ] verbs: ["list" , "get" ] --- kind: ClusterRoleBinding apiVersion: rbac.authorization.k8s.io/v1 metadata: name: cephfs-provisioner subjects: - kind: ServiceAccount name: cephfs-provisioner namespace: cephfs roleRef: kind: ClusterRole name: cephfs-provisioner apiGroup: rbac.authorization.k8s.io --- apiVersion: rbac.authorization.k8s.io/v1 kind: Role metadata: name: cephfs-provisioner namespace: cephfs rules: - apiGroups: ["" ] resources: ["secrets" ] verbs: ["create" , "get" , "delete" ] - apiGroups: ["" ] resources: ["endpoints" ] verbs: ["get" , "list" , "watch" , "create" , "update" , "patch" ] --- apiVersion: rbac.authorization.k8s.io/v1 kind: RoleBinding metadata: name: cephfs-provisioner namespace: cephfs roleRef: apiGroup: rbac.authorization.k8s.io kind: Role name: cephfs-provisioner subjects: - kind: ServiceAccount name: cephfs-provisioner --- apiVersion: v1 kind: ServiceAccount metadata: name: cephfs-provisioner namespace: cephfs
ceph-provisioner-deployment.yaml
1 2 3 4 5 6 7 8 9 10 11 12 13 14 15 16 17 18 19 20 21 22 23 24 25 26 27 28 29 30 31 apiVersion: apps/v1 kind: Deployment metadata: name: cephfs-provisioner namespace: cephfs spec: replicas: 1 selector: matchLabels: app: cephfs-provisioner strategy: type: Recreate template: metadata: labels: app: cephfs-provisioner spec: containers: - name: cephfs-provisioner image: "quay.io/external_storage/cephfs-provisioner:latest" env: - name: PROVISIONER_NAME value: ceph.com/cephfs - name: PROVISIONER_SECRET_NAMESPACE value: cephfs command: - "/usr/local/bin/cephfs-provisioner" args: - "-id=cephfs-provisioner-1" - "-disable-ceph-namespace-isolation" serviceAccount: cephfs-provisioner
保存上述两个文件,并执行kubectl apply
1 2 kubectl apply -f cephfs-provisioner-rbac.yaml kubectl apply -f cephfs-provisioner-deployment.yaml
导入秘钥 1 2 3 ceph auth get-key client.admin > /tmp/secret kubectl create ns cephfs kubectl create secret generic ceph-secret-admin --from-file=/tmp/secret --namespace=cephfs
创建Storage class 1 2 3 4 5 6 7 8 9 10 11 kind: StorageClass apiVersion: storage.k8s.io/v1 metadata: name: cephfs provisioner: ceph.com/cephfs parameters: monitors: 172.16 .31 .11 :6789 adminId: admin adminSecretName: ceph-secret-admin adminSecretNamespace: "cephfs" claimRoot: /pvc-volumes
创建pvc 1 2 3 4 5 6 7 8 9 10 11 kind: PersistentVolumeClaim apiVersion: v1 metadata: name: cephfs spec: storageClassName: cephfs accessModes: - ReadWriteMany resources: requests: storage: 1Gi
创建deployment 1 2 3 4 5 6 7 8 9 10 11 12 13 14 15 16 17 18 19 20 21 22 23 24 25 26 27 28 apiVersion: apps/v1 kind: Deployment metadata: labels: app: test-cephfs name: test-cephfs namespace: default spec: replicas: 1 selector: matchLabels: app: test-cephfs template: metadata: labels: app: test-cephfs spec: containers: - image: zerchin/network imagePullPolicy: IfNotPresent name: test-rbd volumeMounts: - mountPath: /data name: cephfs volumes: - name: cephfs persistentVolumeClaim: claimName: cephfs
常见问题 问题:无法挂载cephfs 1 MountVolume.SetUp failed for volume "pvc-e4373999-8380-4211-99c5-5d096f234b35" : CephFS: mount failed: mount failed: exit status 5 Mounting command : mount Mounting arguments: -t ceph -o <masked>,<masked> 172.16.29.5:6789:/pvc-volumes/kubernetes/kubernetes-dynamic-pvc-b3e72054-4dc7-11eb-abdd-f21be6c36b31 /var/lib/kubelet/pods/5986dc99-b707-4ea9-b6b2-ae7ffd457c99/volumes/kubernetes.io~cephfs/pvc-e4373999-8380-4211-99c5-5d096f234b35 Output: modprobe: ERROR: ../libkmod/libkmod.c:586 kmod_search_moddep() could not open moddep file '/lib/modules/4.4.247-1.el7.elrepo.x86_64/modules.dep.bin' modprobe: FATAL: Module ceph not found in directory /lib/modules/4.4.247-1.el7.elrepo.x86_64 failed to load ceph kernel module (1) mount error 5 = Input/output error
此时手动在后台使用mount.ceph挂载对应的目录也挂载不上
原因
在 cephfs_provisoner.py 的实现中,默认添加了对 cephfs namespace 的支持,因此在对 volume 授权时会添加对 namespace 相关的权限设置。因为,我们使用的 ceph 版本 luminous 没有对 namespace 进行支持,所以,在使用时产生了创建的 volume 挂载到 pod 内后没有读写权限”input/output error”的问题。 此时,你在 cephfs 端查看卷的读写权限时,你可以看到目录读写权限都是问号。于是我们修改了这部分逻辑,去掉了 namespace 相关的部分。
解决
设置ceph-provisioner启动时添加该参数-disable-ceph-namespace-isolation
参考:https://www.infoq.cn/article/jqhjzvvl11escvfydruc
扩展 高可用 添加多个mon
1 ceph-deploy mon add ceph-02 ceph-03
当ceph集群有多个mon时,ceph会同步mon并形成仲裁,检查仲裁状态命令如下:
1 ceph quorum_status --format json-pretty
添加mgr
1 ceph-deploy mgr create ceph-02 ceph-03
查看集群状态
节点清理ceph 1 2 3 4 ceph-deploy purge [ceph-node] ceph-deploy purgedata [ceph-node] ceph-deploy forgetkeys rm ceph.*